Para Español, de clic aquiHow to: Configure Wirecast V5.0 with Windows Media
Purpose:
The purpose of this article is to show you the procedure that need to be taken to successfully configure Wirecast V5.0 with Windows Media using NetroMedia services. This article also assumes that you already have Wirecast installed on your desktop with either Mac or Windows Operating systems.
We will be covering a basic setup on this solution, we will not be covering any advanced features for Push or Pull streaming.
Procedure:
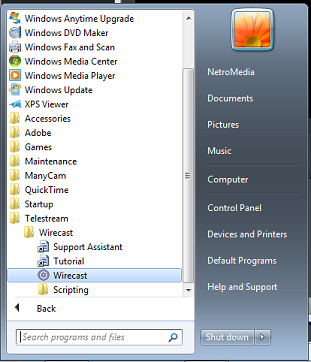
Step 1 - Open Wirecast from the Start menu or from a shortcut on your desktop if you have it.
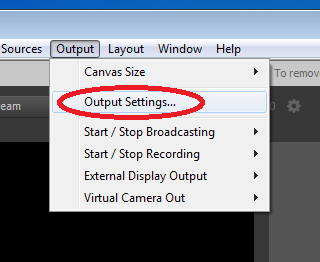
Step 2 - On the menu bar, click on “Output”, then on “Output Settings…”
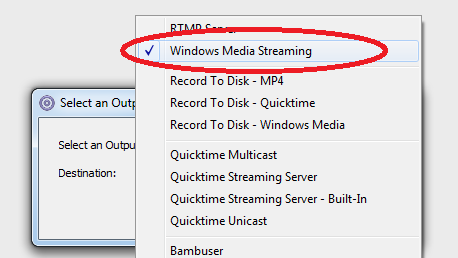
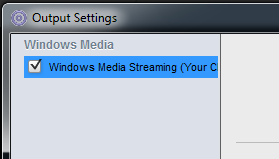
Step 3 - The “Select an Output Destination” window will come up. Select Windows Media Streaming and click OK.
Step 4 - Now, go to your NetroMedia HOME account portal and click on the Windows Media Channel or publishing point that you have created. This is to bring up the channel configuration page.
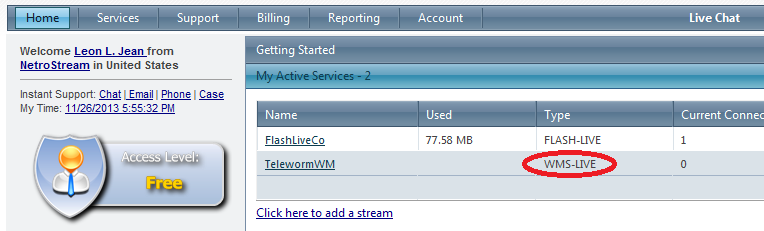
Please refer to the following solution if you haven’t created a channel: How to: Setup your TRIAL service
Step 5 - You should now be able to enter the required data.
- Name: You can name it however you want.
- Destination: For Windows Media, it should be Windows Media Streaming
- Encoding: This can be chosen as desired but keep in mind that here, you will be able to determine the bitrate that you want to use.
- Push Server: Basically with this option, you will be pushing your video content to our servers.
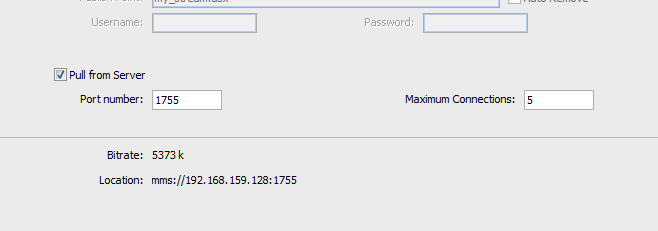
- Pull from Server: This option turns your local computer into a mini Windows Media Server, enabling you to broadcast immediately and we can pull the stream from your location. This option is the most stable but if has more steps to get accomplished.
Push to Server
Step A - You will need to scroll down the Channel configuration page to copy the server settings into your Wirecast “Output Settings”.
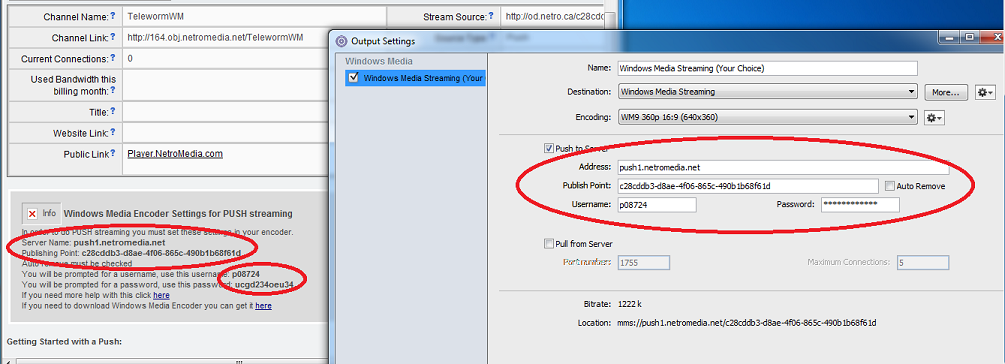
Step B - Click on OK when Done.
Pull from Server
Step A - Select the desired port but it’s recommended that you leave the default, select your "Maximum Connections" and click on OK when done.
Step B - Now, you will need to setup port forwarding on your network so we can pull the streaming from your location. Please refer to this article for more information: How to: Setup PULL to stream in Windows Media Win7, Vista and XP
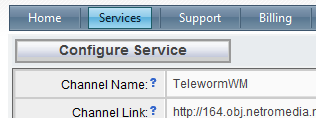
Step C - Once you have configured your port forwarding, you will need to reconfigure you channel for Pull streaming. Click on the "Configure Service" button on your Channel.
Note: You can also create a new channel as pull.
Step D - Change your Stream type from Push to Pull.
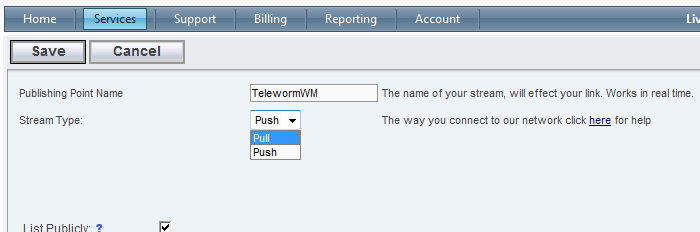
Step E - You will now get a new field called Publishing Point Source and you will need to enter your stream feed address http://IPADDRESS:PORT .
Step F - Click on Save when done.
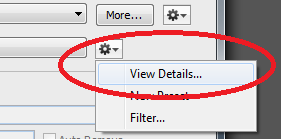
Step 6 - Now, to change the bitrate, click on the "Gear" besides the Encoding setting and click on “View Details”.
Step 7 - This will bring up the Encoder Preset Window. Select your desired “Encoder Preset”.

Step 8 - On the “Average bit rate” field, enter the bitrate you wish you use.

Step 9 - You might want to play around with the rest of the settings to see what is best for your streaming. To get more information on these settings, please go to the following link: Wirecast Support (Go to Wirecast 5, Output Settings, Encoder Presets and Windows Media Encoder Presets.)
Step 10 - Click on Close when you have made your changes.
Step 11 - Review and click okay when you are done to save your setup.
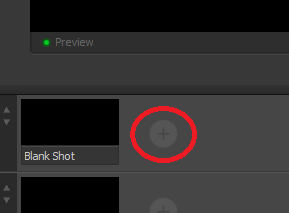
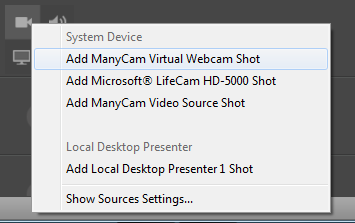
Step 12 - Below the Preview box on Wirecast, move your mouse over the “+” sign and select your desired source.
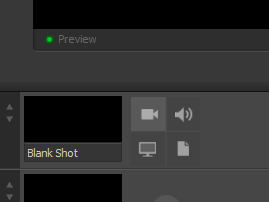
Step 13 - We will need to add the source or device needed.
Step 14 - Make your changes as needed on the source device settings you have selected and save when done.
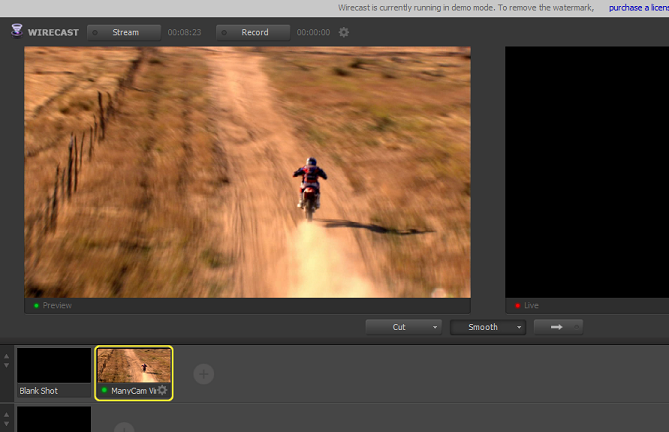
Step 15 - Selected the source you have just added to this can appear on the preview box of Wirecast.
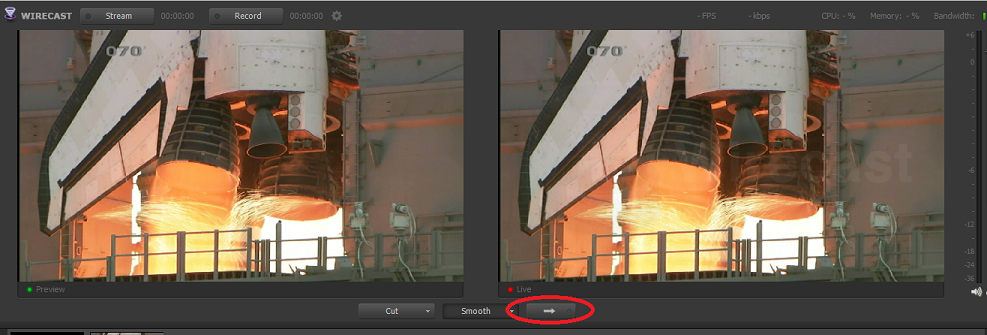
Step 16 - When ready, click on the arrow button located in the middle on the encoder.
Step 17 - On the Wirecast menu bar, click “Output” and the “Start / Stop Broadcasting” and select the Windows Media that we configured previously.

Step 18 - You can also click on the "Gear" button located on the top above.

Step 19 - And make sure that you its selected and click OK.
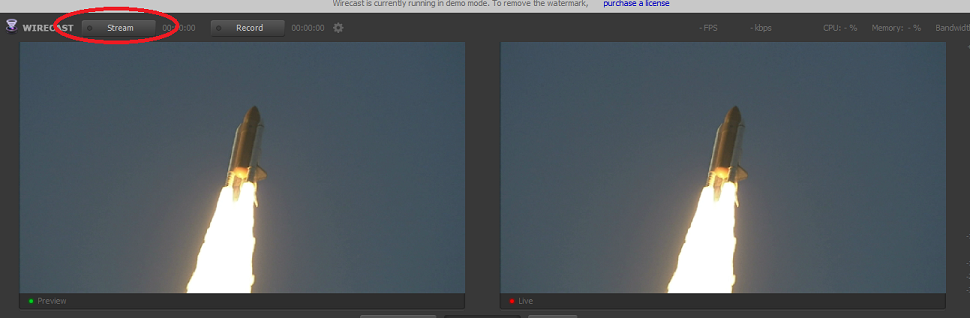
Step 20 - When ready, all you need to do now is click on the "Stream" button located on the left side of the
encoder.

Other FAQ's you might be interested:
If you found this FAQ helpful please rate it using the stars below: