Para Español, de clic aqui
For a better view, use Full Screen mode
Purpose
The purpose of this article is to explain the procedure that needs to be followed in order to successfully upload your media files on our NetroMedia servers for on demand streaming.
Step 1. Download the lastest Filezilla Client for your Operating System here: http://filezilla-project.org/download.php
Step 2. Double click the installer to start the installation process and follow the Wizard instructions.
Step 3. Once installation has completed, make sure "Start Filezilla Now" is checked.
Step 4. Log in to http://login.netromedia.com with your user ID and password.
Step 5. From the Home Portal, select your on demand channel/publishing point that you have created.

Step 6. Alternatively, select "My Active Services" from the Services menu and select the channel from there.

Step 7. You will be taken to the following Detail Page view:

Step 8. Use the following info from your Service Detail page:
- FTP Username
- FTP Password
- FTP Hostname
Step 9. Enter these details in to the sections shown below:

Step 10. Click "Quickconnect" button and you will be connected to your FTP Storage Location.
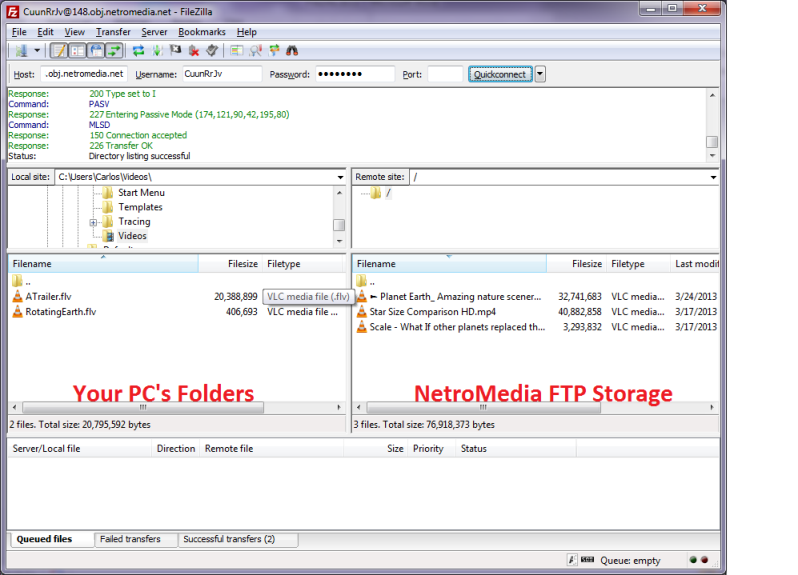
Step 11. Below is an overview of the Filezilla Interface:

Step 12. Double click on a File in the left hand pane or drag and drop to upload to the NetroMedia Storage FTP.

Step 13. You can view progress in the bottom panel:

Step 14. Once the progress bar is at 100%, your file has been uploaded.
Step 15. See the following solution for viewing your content: How to: Use the NetroFileManager
N.B. - Connecting to NetroMedia FTP Servers requires TCP Ports 50000 - 50004 open. If you cannot connect, or are repeatedly disconnected, connect using "Active" mode, detailed below.
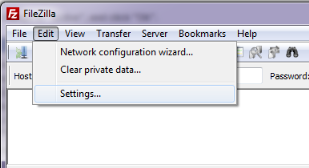
Step 1. Select the "Edit" menu and click on "Settings":

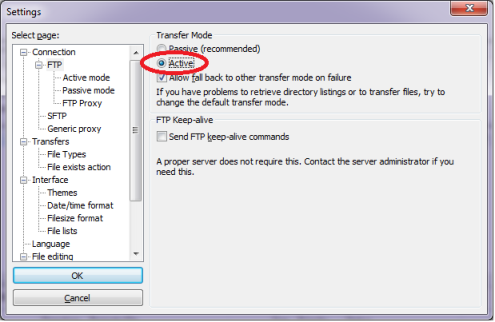
Step 2. Select "FTP" in the menu structure, change to "Active", and click "Ok".

Other FAQ's you might be interested:
If you found this FAQ helpful please rate it using the stars below: