How to: Stream Flash using Open Broadcaster
Purpose:
The purpose for this article is to explain the procedure that needs to be done in other to successfully configure your Open Broadcaster software using Flash. This FAQ will assume that you already have an account with Netromedia and a Flash channel created. If in case you don’t have an account with us, you can always create a trial account on the following link: Create you trial account here!
Additionally, you can also refer to the following official OBS links:
Procedure:
Step 1. Proceed to download and installed Open Broadcaster from the following link: Download Open Broadcaster
Step 2 - Once you have downloaded and installed open broadcaster proceed open the application.
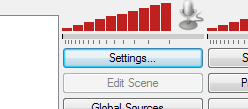
Step 3. Click on the settings button.

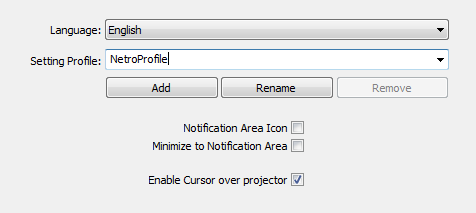
Step 4. Select you language to use.
Step 5. Create your Settings Profile for future use and click on the Add button.

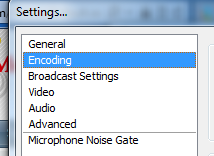
Step 6. Click on the Encoding option located on the left side of the Settings window.

Step 7. We suggest that you use the following settings but you can make the changes as desired.
-Video Encoding
- Use CBR: should be checked.
- Enable CBR: should be checked.
- Max Bitrate: should be 80% of your upload throughput, but lower would be recommended. For more information on this, please refer to the following article: How do I choose my bitrate / bit rate?
- Use Custom Buffer Size: should be checked.
- Buffer Size (Kbit): is recommended to be equal to the bitrate you will be using.

-Audio Encoding
- ·Codec: is recommended to be set to “AAC”
- ·Bitrate: bitrate of “64-128” is recommended
- ·Format: can be to your preference

Step 8. Now let’s click on the “Broadcast Settings” and use the following recommended settings:
- Mode: Should be set to Live Stream.
- Stream: "Service” should be set to Custom.
- Server: You will enter the “FMS URL” which can be found on your NetroPortal. Covered in Steps 9, 10 and 11.
- Play Path/Stream Key: You will enter the “Stream name” which can be found on the NetroPortal. Covered in Steps 9, 10 and 11.
- Auto-Reconnect Timeout: Default is “10 seconds”.
- Delay: Should be set to “0”, but if you need delay set locally you can do this to prevent "ghosting."
- Minimize Network Impact: This should be unchecked. If you are an advanced broadcaster, or having issues with your network settings, use this setting.
- Dashboard Link: You can copy over the Channel configuration link.
- Save to file: Should be checked in case you want to save your live broadcast on a file for later on demand broadcasting.
- File Path: Path to save the file. Not needed if you do not save a local file.
- Start Stream Hotkey: Combination of keys to Start Broadcasting.
- Stop Stream Hotkey: Combination of keys to Stop Broadcasting.
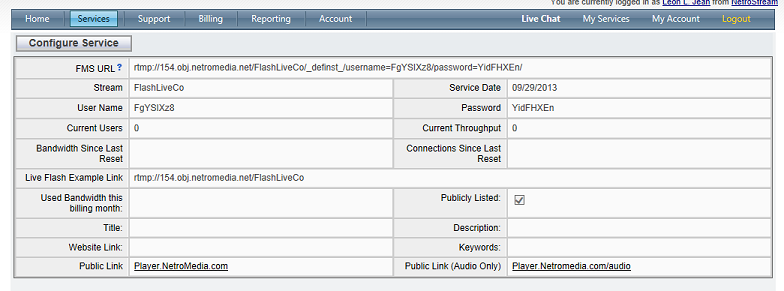
Step 9. On the NetroPortal click on “Services”, “My Active Services” and click on the Flash channel that you have created so you can get to the channel configuration page.

Step 10. Copy the “FMS URL” from the Channel configuration page and paste it over the server field on the Open Broadcaster Settings window.

Step 11. Now copy the “Stream Name” into your “Play Path/Stream Key” field on the Open Broadcaster.

Step 12. Click on Apply when you are done.
Step 13. This is all you need to start streaming with NetroMedia. The rest of the Settings for Video, Audio, Advanced and Microphone Noise Gate can be left as default. But again, if you need to make changes, go ahead. More details on these settings here: Open Broadcaster Official Overview Guide
Other FAQ's you might be interested:
If you found this FAQ helpful please rate it using the stars below: