Para Español, de clic aquiHow to: Configure Windows Media Encoder - Pull streaming
Purpose:
The purpose of this article is to show you the procedure that needs to be followed to successfully configure your Windows Media encoder to stream using the Pull Method.
Benefits:
'Pull' Live Webcast with Windows Media Encoder When Windows Media Services 'Pulls' the content from the encoder, the server connects to the encoder stream in progress and pulls the content. The primary advantage of ‘Pulling’the encoder is the auto re-connect feature.
If you lose your connection to the server, the server will re-connect to your encoder automatically once your Internet connection resumes. In order to stream in a 'pull' configuration you must have a static IP address. If your encoding computer is behind a router, your router must also be configured to port forward.
Note: Windows Media Encoder is no longer available or supported by Microsoft;the new encoder provided is Microsoft Expression encoder. Instructions on obtaining this encoder and downloading it can be found here: Configure Microsoft Expression for PULL Streaming
Requirements before starting:
1. To start a live "Pull"stream with Windows Media Encoder: Download Windows Media encoder and install the encoder with the default installation settings.
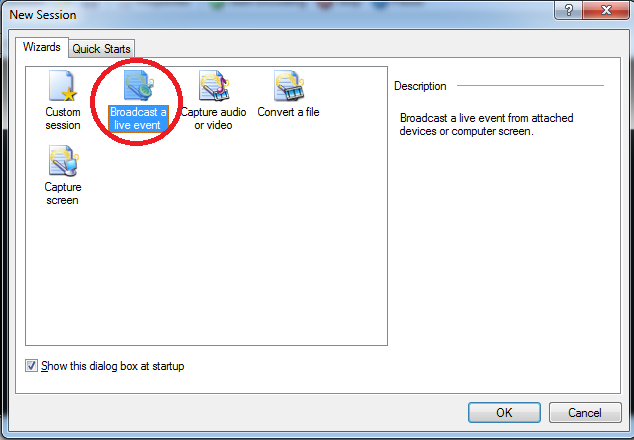
2. Start the encoder and double click "Broadcast a Live Event".
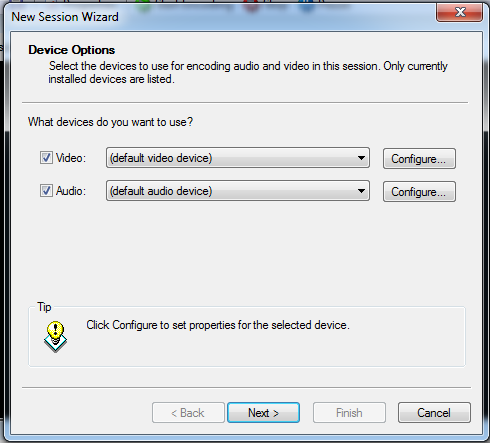
3. Select your source(s): audio and/or video. If you have more than one sound card you can select it from the list. Make sure you select the sound device that your audio signal is connected to.
4. Set your output to “Pull”on the Broadcast Method and click next.

5. Enter the port you have previously configured on your network and firewall and click Next. Default port is 8080.

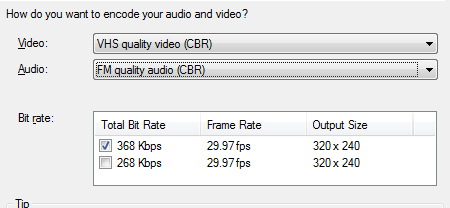
6. Proceed to select the bit rate that you will be using and click Next. The standard bit rate is around 340 kbps so you can use this number for reference.
7. The next window asks if you would like to archive a copy of the broadcast to your hard drive. Only select this option if you:
- a. have plenty of hard drive space
- b. have sufficient processing power (this option takes a significant toll on your processing capability)
- c. require an archived copy of what you are broadcasting
8. Enter the "Display Information”The enclosed stream information will show up in the Windows Media player window of your listeners computer screen and click Next when done.
- Title: The name of your stream
- Author: The name of your stream author
- Copyright: Any relevant Copyright information
- Rating: The stream's rating
- Description: Any additional information you wish to include
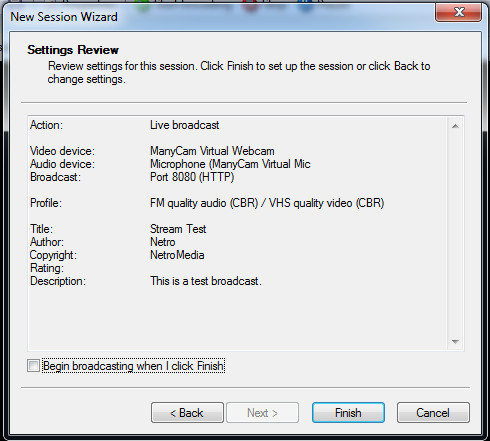
9. Enter "Settings Review"This window allows you to review your settings before you begin to broadcast live.
10. Start your encoder: Located on the top toolbar there should be a green button that says "Start Encoding". When you are ready to start encoding, press this button and you are live. Make sure the encoder says “Encoder Broadcasting”in the bottom left of the encoder screen.

If you are behind a router, make sure your router is set to Port forwarding to the machine on your local area network (LAN) that is running the encoder. This is required so that the encoder can handle requests on the port you configured. Go to http://login.netromedia.com to confirm your IP address, it is displayed in the bottom right of the page.
Testing Your Live Stream
If the encoder is running and you are not able to connect to your stream through our server link, you can test if your encoder is working properly by the following:
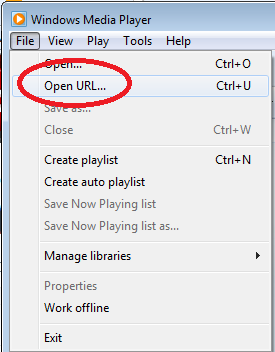
1. Open your Windows Media Player and click on ‘File’then ‘Open URL’.
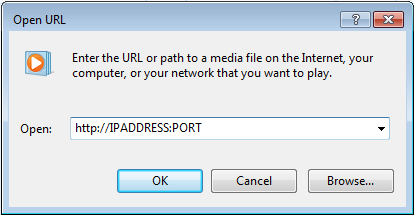
2. If you enter your IP address and port number here you should be able to connect directly to your encoder using the following format: http://IPADDRESS:PORT
3. If you are unable to connect to your encoder, then the most common issues are:
- You are behind a software firewall and need an exception for TCP port 8080, you may also need to port forward through your router's hardware firewall.
- You are trying to distribute your content at a bit rate your internet connection up-load capacity cannot support.
- Your currently have the Windows Firewall turned on: Turn off Windows Firewall